A Guide to Retouching Real Estate Images in Photoshop
Retouching images has been around for many years. Some applications are removing blemishes from models or in advertisements and making them look flawless. This increases the attractiveness of the photo and more often than not, increases the sales of the products associated with the photos. Real estate image retouching is no different and has been a must in today’s photography business. Whether it is done in-house or outsourced, the proper thing to do is put on the finishing touches on the photo.
Table of Contents
This article will be your Photoshop guide and will take you through some useful tips in real estate image retouching which you can use to spruce up your photos for that nice clean image.
What is Basic Photo Retouching?
Before we begin to define basic photo retouching, we want to make sure that the difference between editing and retouching are clear. Editing is always a must in every photograph for your real estate client. The editing is where the major changes happen including the brightness, color saturations, hues, staging of furniture, and weather changes, etc. These are the things your client will expect at the very least. Retouching images is the process after image editing. It requires the removal of the little things that can make a photo appear cleaner and more pristine. There is a next level of retouching which this article will not cover but it is essentially the same, it just deals with the larger objects.
Now that we are clear on what basic photo retouching is, let us get into the things you might want to consider in real estate image retouching. Keep in mind that basic photo retouching in real estate will result to people focusing on the property’s features rather than the little things around it, and here is the list of things to look out for:
- Unnecessary exterior articles – Now when we say articles, we mean the ones that can be legally removed from a photo. If there are trees, mailboxes, lamp posts, or anything that will not be removed or cannot be removed due to legal reasons, by all means keep it there. The ones you want to remove are animals, cars, stains on the wall, fallen leaves on the lawn, and such. These are the things (but not limited to) that can be physically removed by realty editor.
- Adding life to the exterior – The opposite of removing, is well, adding in. Retouching images can include making a lawn appear more greener that it is or making the sky bluer making it appear as if it were midday even if the shoot was done in the late afternoon.
- Replicating interior furniture – If during a photo shoot, there is only one chair available to showcase the viability of the kitchen counter to be a breakfast table for 3, then image retouching can add these into by certain techniques found in this Photoshop guide.
- Removing reflections – While the best shot may be facing a mirror to showcase the dining area, it may seem odd to publish the picture with the photographer (yes, you!), or the lighting equipment in the photo. Retouching can solve this problem of making it seem like the mirror does not reflect you so that your image can be spotless.
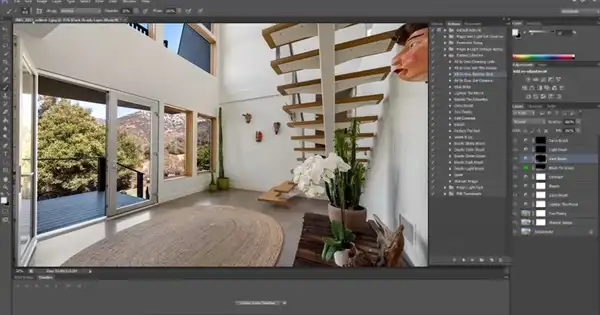
How Do You Edit Real Estate Images in Photoshop?
This Photoshop guide can help you started with some of the basic tools and techniques. There are numerous in-depth tutorials available, free or paid, even from real estate photo editing with Adobe Photoshop CC themselves but this guide will be sufficient to kick things off and get the ball rolling for you.
- Layers – Begin by opening the program and opening the file you wish to retouch. Now one of the things you have to keep in mind that retouching is not done on this first photo, but on layers on top of it. Simply create a new layer by going to the button of the same name as the command and start your work of art!
- Spot healing tool – For the parts of the photo where objects have been added in, the spot healing tool allows a seamless merging of edges which will make the object blend in smoothly as if it were there during the photo shoot.
- Clone Stamp – The replication happens with the clone stamp tool. Select an object you want to clone and while holding down that Alt button, select the part of the image you want to copy. Release the said button and the object copied can now be clicked and positioned to your liking.
- Dodge tool – The dodge tool is the lightening tool, and it works over localized areas of images where the exposure can be adjusted. Simply go to the tool bar or tool palette and select dodge from the “dodge and burn”.
- Burn Tool – Opposite the dodge tool is the burn tool which darkens localized areas of interest and can be found where the dodge tool is.
- Smart Sharpen – In real estate photo retouching, properties will have more than its fair share of straight lines and edges. Smart sharpen is able to distinguish the edges from the background and focuses on that part in order to emphasize it without compromising the surroundings. It can be found in the filter menu under sharpen.
- Background Eraser – As the name suggests, it can erase an object or objects within the photo without affecting other areas. However, for this to work properly, layering is a prerequisite so that other parts appear untouched when a selected area is erased. Simply click the eraser icon on the tool palette and select the background eraser tool.
Conclusion
Retouching images is quite fascinating and while it is a useful process, it should not be confused with editing. Real estate image retouching requires a keen eye to spot the blemishes that you want to remove and an imaginative mind to add in what you want. But of course, do not limit yourself to those two techniques. The Photoshop guide hopefully has given the momentum to get you started on retouching and make those photos top-notch to help your real estate partners sell faster and better.
Relevant Quick Links:
- The 6 Most Important Real Estate Photography Trends and Why
- How to Sell More By Outsourcing Your Real Estate Photo Editing
- 10 Interesting Real Estate Photography Facts You Should Know
- Real Estate Photo Editing
