Real Estate Photography Editing for Aerial Shots
Selling a property indeed requires a good presentation of the home both inside and out. Utility and beauty play a significant part in drawing people’s attention in and letting them feel like the property is for them to purchase. However, one element that listings also must take advantage of is the fact that a property’s location helps sell it big time. Prime locations that are close to business districts or beaches must be included in the listing to boost the attractiveness of the property. It also reaches out to people with very specific wants from buying their next dream home. In some instances, a home surrounded with commercial establishments such as supermarkets, dairies, restaurants, or even a mall will be attractive to people looking to find convenience in the location of the property.
Table of Contents
To give emphasis to the plus the location of these properties bring, aerial shots have come into light in the recent years. Drones in particular allowed photographers to snap photos of towns, residences, or nearby landscapes that will showcase the advantages of living in that area. After which, real estate photo editing must contribute to highlighting these positive aspects by making them stand out in the photo whether through explicit or implicit effects. Aerial shot photo editing must also consider strategic points of taking photos. It is not enough to take pictures of the property from up high but must think carefully how to present the photo so that it serves its purpose.
Drone Photography
The choice of drone you use must have photography capabilities. Attaching a camera to a drone and letting it fly out is risky due to the fact that the vibrations from the drone itself can cause the camera to unlatch and fall to the ground. Another advantage of having a camera built into the drone you purchased is the remote photo snapping capabilities. A remote trigger on a normal DSLR may not be able to cover the range to snap that picture when the drone is already high up in the air.
Another consideration is knowing the city ordinances or laws on flying drones. Nearby military facilities or government locations may not allow privately flown objects in the vicinity, thereby getting you in trouble. When in doubt, check with your local police station or town hall.
To maximize the photos taken to later capitalize on real estate photography editing, consider a checklist of what photos to take and in what angle they will take the form of. Here is a short list to help you get started.
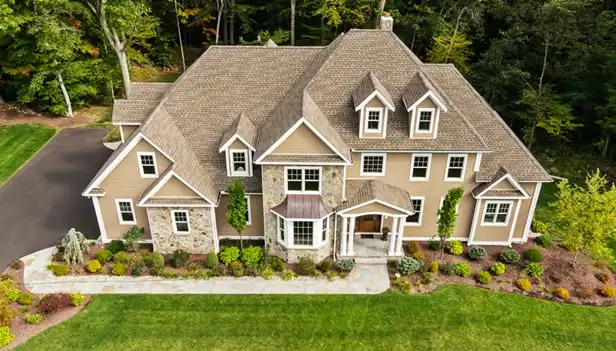
- Rooftop shots – The effect of shooting directly from above shows where the property is located, and more importantly gives the potential buyer a quick view of what the size of the property is. It also shows the density of the neighborhood which some people might consider as a selling point.
- Get an aerial shot of the property – This shot will give you a chance to angle the photo to show the roofing and the home together in one shot. The advantage is to present the details and material used in the roofing which to some buyers, may be quite important as well.
- An angled shot of the vicinity and neighboring areas – Having this shot will help later on during real estate photography editing especially when a beach or a city is located near the property. It will show approximate distances that people may want to know or estimate.
How to Edit Aerial Shots?
Aerial shot photo editing techniques does not differ much from basic real estate photo editing. What this aims to do is to help sell the home as well but now includes the element of also selling the advantages of the location. Using software such as Adobe Photoshop, editing can be done in a breeze to produce those stunning photos.
-
Selecting the Photos
For sure you have taken multiple shots from your drone to make sure that you have a lot of pictures to choose from after going through that task. Filtering out what you need from what you don’t will help alleviate the stress later on as it avoids mixing the ones you need from the ones you don’t. Separate them in different folders to easily export a group onto the editing software.
-
Editing for Color and Brightness
Light and color are your best friends in real estate photography editing and it is no different in editing aerial shots. Rooftop and angled shots will definitely cast shadows which can be a pain if it covers a lot of the important aspects of the locations. Remove them and increase the sharpness of the houses in the photo, making sure that the one you are trying to sell stands out from the rest. A good sky replacement is also favorable in cases where the sky in the horizon is not as bright as the one in your area. Finally, liven up the streets and brighten them using the dodge tool as needed.
-
Location Identifiers
Last but not the least, identifying the critical locations that will definitely put the property on the map is a must for aerial shot photo editing. The property must be properly identified using creative means such as pinned location markers or a brighter exposure compared to the surrounding to make it pop out. For other significant locations, use pins or arrows to point at them and label them to give the potential buyer a glimpse of the proximities of these locations.
Conclusion
The possibilities for aerial shots are limitless and downright exciting. Taking shots from a drone and performing aerial shot photo and video editing brings a whole new set of creativity in your portfolio. Before jumping in, know the best drone for your needs and research on a location’s regulations on flying drones. This will help you maximize the experience by making sure everything goes smoothly. Note that when considering aerial shots, know the surrounding area’s positive points to showcase and what it has to offer to potential buyers in order to take advantage of those points of emphasis. Realty editor must complement the aerial shots by emphasizing the property together with the advantages of buying it.
Relevant Quick Links:
- Real Estate Photo Editing
- Real Estate Image Editing
- Knowledge Base
- The 8 Best Drones You Must Discover for Real Estate Photography Business
- 10 Ultimate Tips and Tricks for Real Estate Aerial Photography Editing
